


Let's be real—text isn't just an afterthought for your TikTok videos; it's one of the most powerful tools you have right in the app. Just tap the "Aa" icon after you film, type out what you want to say, pick a font and color, and time it to pop up exactly when you need it. It’s that straightforward.
Why Adding Text to TikToks Is a Smart Move
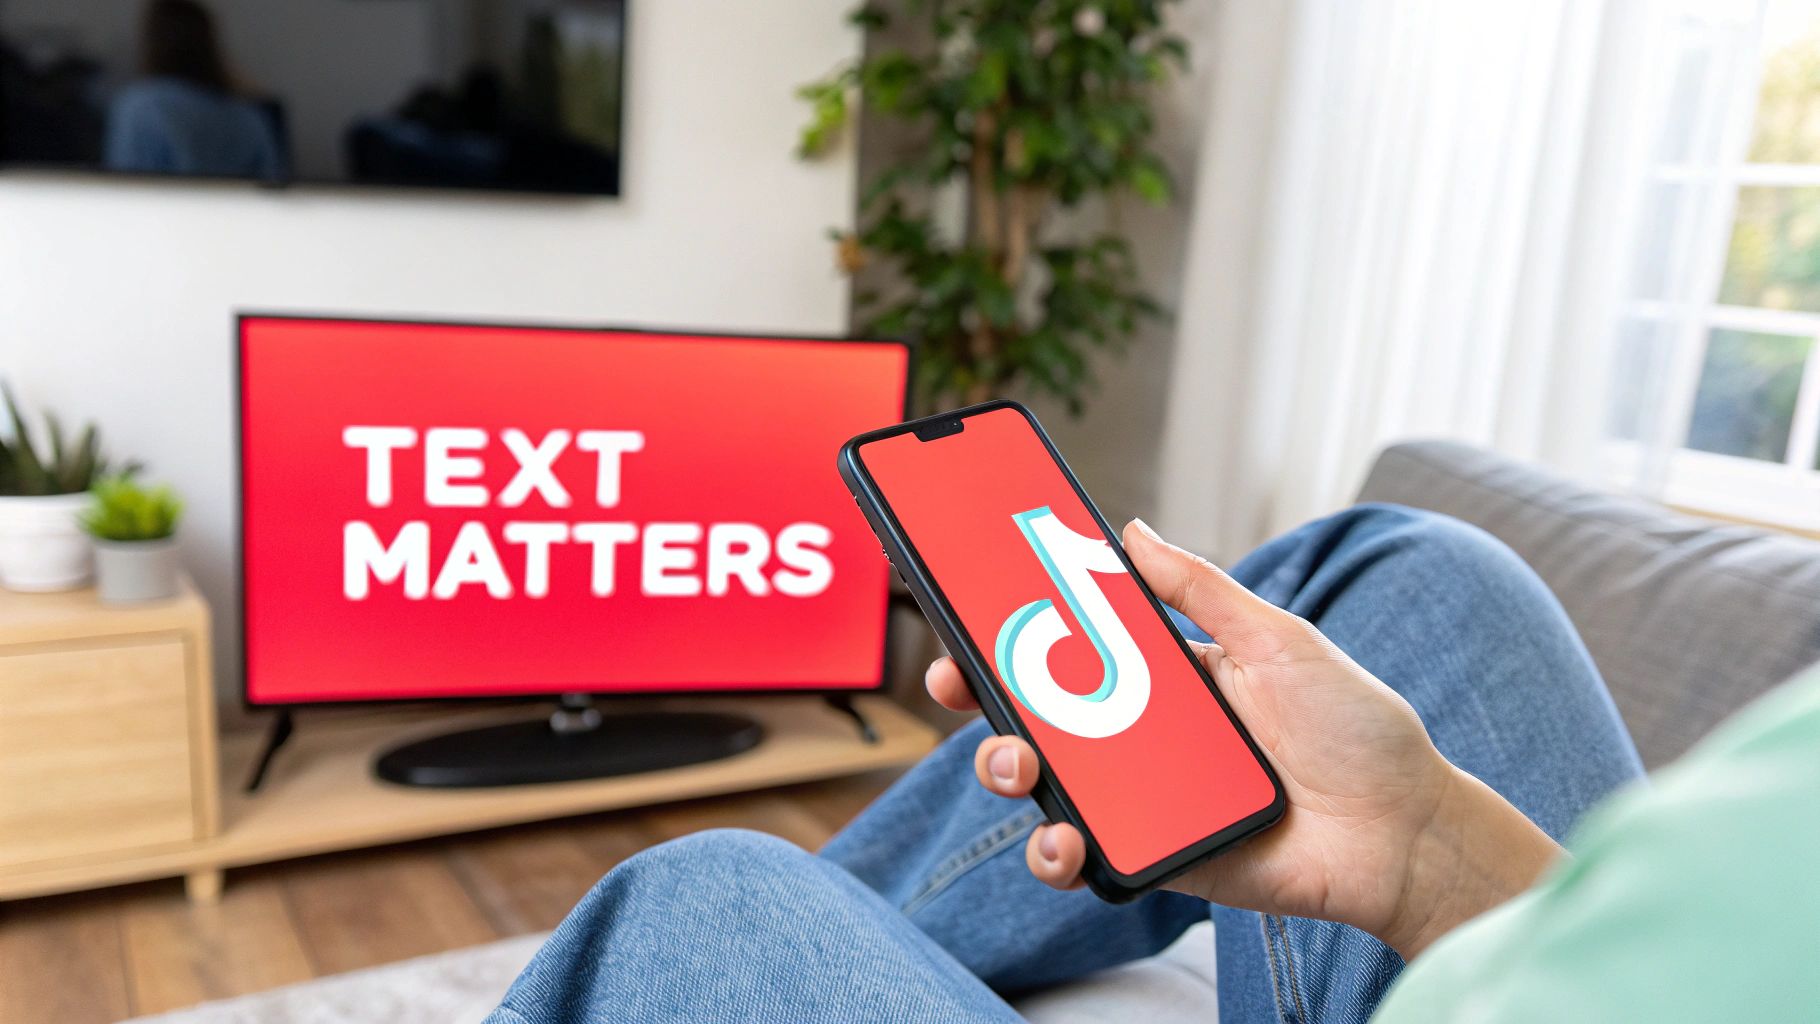
Before we jump into the step-by-step, let's talk about why this matters so much. Slapping some text on your video isn't just about decoration. It's a strategic play that can make or break your video's performance. In a world where most people scroll with their sound off, text overlays are your best bet to make sure your message actually lands.
Capture Attention Immediately
You have about three seconds to stop someone from scrolling past your video. That’s it. A punchy, interesting text hook is your secret weapon to make them pause and watch. Think of it as your video's headline—it needs to spark curiosity and set the scene instantly.
For instance, imagine a travel video. Instead of just showing a pretty beach, a text hook like "The one place in Italy tourists don't know about" creates an immediate mystery. That simple phrase gives viewers a reason to stick around and see what you've got.
Boost Accessibility and Reach
Using text is also about being inclusive. It opens up your content to viewers who are deaf or hard of hearing, letting them in on the conversation. Plus, you’re catering to the huge crowd of people watching TikToks on the bus, in a waiting room, or anywhere else where their phone is on silent.
Here's a number that might surprise you: between 70% and 80% of people watch social media videos with the sound off. That means text isn't just a nice-to-have; it's absolutely essential if you want your message to get through.
Making your content accessible automatically widens your potential audience, which is a huge deal for growth. If you’re serious about growing, check out these TikTok content ideas to go viral for more ways to make an impact. And for creators ready to level up fast, getting a monetized TikTok account can give you a massive head start.
Let's break down exactly how adding text gives your content an edge.
Key Benefits of Using Text in TikTok Videos
This table sums up the core advantages of using text overlays in your content strategy. It's all about boosting engagement, accessibility, and overall clarity.
| Benefit | Impact on Your Video |
|---|---|
| Increased Engagement | A strong text hook stops the scroll and keeps viewers watching longer. |
| Improved Accessibility | Makes content understandable for the deaf/hard of hearing and silent viewers. |
| Enhanced Storytelling | Adds context, narration, and personality that visuals alone might miss. |
| Better Information Retention | Viewers are more likely to remember key points when they see and hear them. |
| Clearer Call-to-Action | Explicitly tell viewers what to do next (e.g., "Follow for Part 2!"). |
As you can see, the benefits go way beyond just looking good. Text is a fundamental part of creating high-performing, accessible, and engaging content on TikTok.
Getting Started with TikTok's Built-In Text Editor
Let's start with the tools you already have right inside the TikTok app. The native editor is way more powerful than most people give it credit for, and you can create clean, effective text overlays without ever leaving the platform. We're going to go beyond just tapping the 'Aa' button and really dig into how you can make your text a core part of your video's story.
Once you’ve recorded or uploaded your clip, your journey begins with the 'Aa' icon on the right-hand menu. This is your command center for adding words to your video. Type out your message, but don't hit "Done" just yet—this is where the fun really starts.
Choosing Your Font and Color
The font you pick completely sets the mood. TikTok gives you a bunch of styles, from the bold, in-your-face "Classic" font to more playful scripts and elegant typefaces. Think about what actually fits your video's vibe. A funny skit probably calls for a bubbly, rounded font, while a quick tutorial might need something clean and super easy to read.
After you've found the right font, color is your next best tool for grabbing eyeballs. You’ll see a row of color bubbles at the bottom of the screen to choose from. The key here is contrast. Light-colored text will pop against a dark background, and dark text is much easier to read over a bright, busy scene. Play around with it for a few seconds to see what feels right.
Making Text Readable with Backgrounds and Outlines
Ever notice how text can just disappear into a video with a busy background? A scene with shifting light and dark areas can make your words almost impossible to read, no matter what color you pick. This is where backgrounds and outlines are absolute lifesavers.
Just tap the 'A' icon on the left side of the text editor, and you can cycle through a few killer styles:
- No background: This is just your plain, simple text.
- Solid background: Puts your text inside a solid-colored block, which is fantastic for maximum visibility.
- Translucent background: My personal favorite. It's a slightly see-through background that adds emphasis without totally blocking the video behind it.
- Outline only: This adds a subtle border around your letters, giving them just enough pop to stand out.
Pro Tip: If you need a can't-fail combo for readability on pretty much any background, go with white text and a semi-transparent black background. It's a classic for a reason—it just works every time.
Adding Personality with Text-to-Speech
One of TikTok's most iconic features is, without a doubt, Text-to-Speech. This handy function reads your text aloud in one of those familiar computer-generated voices, which can add a whole new layer of narration or humor to your content. It’s a brilliant way to add commentary or tell a story, especially if you're not quite ready to use your own voice.
Activating it is super simple. After you’ve typed out your text, just tap on the text box you created and look for the "Text-to-speech" icon—it looks like a little person's head with soundwaves. From there, you can pick from several different voices that have become famous in their own right on the app.
Getting comfortable with these native tools is the first real step to mastering how to add text to your TikTok videos. You can create some seriously engaging content with just these features. Once you've got this down, you'll be ready to move on to the more advanced stuff, like timing and animation.
Controlling Text Timing and Duration
Once your text looks good, it's time to make it move right. This is where you separate the good videos from the great ones. It’s all about nailing the timing—making your text appear and disappear at the perfect moment to match the rhythm of your video.
After you’ve added your text and picked your style, don't rush to hit "Done." Instead, just tap on the text box you created. You'll see a small menu pop up. The option you want is "Set duration," which has a little clock icon next to it. Tapping this opens up the timing editor.
You'll be taken to a timeline view of your video clip, with your text highlighted in a little bar. You can grab the red handles at either end of that bar and drag them to decide exactly when the text shows up and when it vanishes. It's a surprisingly intuitive way to make words appear right when you say them or disappear on a beat drop.
Mastering the Art of Text Syncing
Getting your text to sync up perfectly with your video is what gives it that professional, polished feel. It's not just about slapping words on the screen; it's about making them part of the story.
Think about a "Get Ready With Me" video. You could have "Step 1: Moisturizer" pop up the exact second you grab the bottle. Then, as you move on, that text fades out and "Step 2: Foundation" appears. This simple technique guides your viewer through the process and keeps everything looking clean and easy to follow.
The infographic below breaks down the basic flow, from adding the text to finalizing the timing.
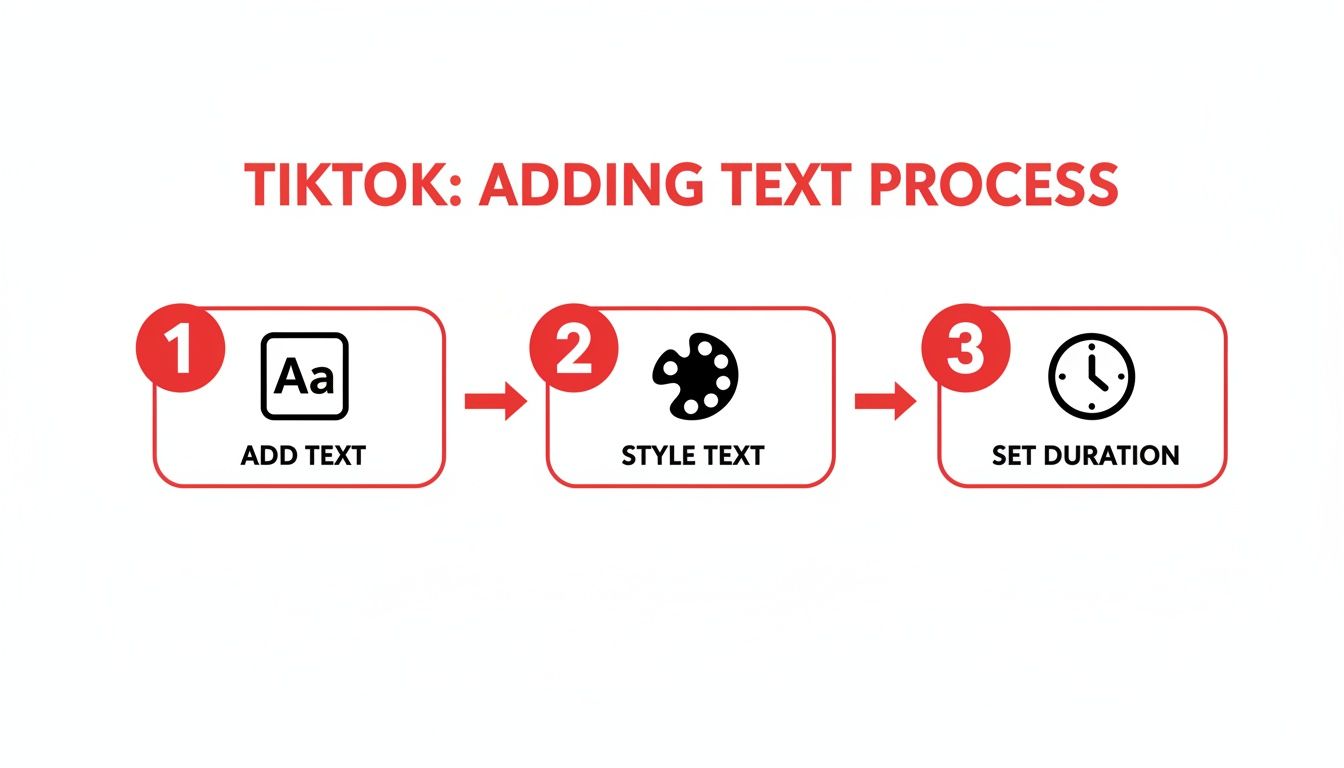
As you can see, controlling the timing isn't an afterthought—it's the final touch that brings your text to life.
Layering Text for Advanced Storytelling
Why stick to one text box at a time? The real fun begins when you start layering multiple text elements, each with its own timing. This is a game-changer for building suspense, revealing a list one item at a time, or creating those super fast-paced, engaging edits.
The process is simple: just add each word or phrase as a new, separate text box. For each one, you just repeat the steps:
- Add and style the text.
- Tap it and choose "Set duration."
- Drag the handles on the timeline to set its timing.
This lets you create a sort of conversation on screen, with different text boxes popping in and out independently.
I’ve seen creators do this brilliantly: they’ll have a question appear for a few seconds, let it disappear, and then have the answer pop up. It's a small thing, but it sparks curiosity and keeps people watching to see the reveal.
This kind of strategic timing does more than just look cool—it directly impacts viewer retention. We know that by 2025, the algorithm is heavily rewarding videos that keep people watching past the 15-20 second mark. Hitting completion rates over 75% can give your video a massive distribution boost. Well-timed text helps get you there, especially since so many people watch with the sound off.
If you want to dig deeper into what makes the algorithm tick, check out this analysis of the TikTok algorithm.
By carefully choreographing your text, you’re not just adding information; you’re guiding your viewer's focus and making your content feel incredibly deliberate and professional.
Taking Your Text to the Next Level with Other Apps
Let's be real: TikTok's built-in editor is great for getting text on your videos quickly. But when you see those clips with text that perfectly tracks a moving object or features a super unique, branded font, you can bet they're not just using TikTok.
To get that truly professional look, you need to step outside the app. This is where third-party editors become your secret weapon. They unlock a level of creative control that helps your content stand out in a crowded feed.
You don't need a full Hollywood editing suite, either. Two of the best and most popular tools out there are CapCut and Canva. They're both incredibly powerful and have become essential parts of my own content creation workflow.
Mastering Motion with CapCut
If you're looking for advanced in-video text effects, CapCut is the answer. It's made by the same company as TikTok (ByteDance), so the integration is seamless, but it's packed with features that feel like they should be in a pricey desktop program.
When you want to know how to add text to TikTok videos that pops, animates, and interacts with your footage, CapCut is where the magic happens. Its text tools are a massive upgrade from the native app.
- Huge Animation Library: Forget the basic fades and slides. CapCut gives you access to hundreds of animations to make your text bounce, glitch, flicker, and type on screen in ways that grab attention immediately.
- Object Tracking: This feature alone is a game-changer. You can literally pin a piece of text to a person or object in your video, and the text will follow it automatically. Think of a label perfectly tracking a product as you unbox it—that's a high-end effect you can pull off in seconds.
- Custom Fonts: This is a big one for branding. TikTok has its set fonts, but CapCut lets you import your own. If you have a specific brand font, you can finally use it to keep your content looking consistent and professional.
I constantly use CapCut for my video intros. I'll have the title animate onto the screen, one word at a time, perfectly synced to the beat of the music. Trying to do that in TikTok would be a nightmare, but in CapCut, it's just a few taps.
Designing Stunning Graphics with Canva
While CapCut is all about motion, Canva is the undisputed king of beautiful, static design. When you want a polished title card, an aesthetic-looking list, or a branded quote to place over your video, Canva is the tool you need.
The process here is a little different. You don't type directly onto your video. Instead, you design your text element in Canva—maybe with a cool background or other graphic elements—and save it as an image (pro tip: use a transparent background!).
Then, you just import that image into your video editor as an overlay. It's perfect for:
- Creating clean, perfectly aligned text layouts.
- Tapping into Canva’s massive library of fonts, templates, and design elements.
- Keeping your branding tight and high-quality across all your videos.
So, how do you choose? If you need text that moves with your video, CapCut is your go-to. If you need a beautifully designed, static text graphic to place on your video, Canva has you covered. Honestly, most serious creators use both.
Here’s a quick breakdown of how these tools stack up against the native TikTok editor.
TikTok Editor vs Third-Party Apps Feature Comparison
| Feature | TikTok Native Editor | CapCut | Canva |
|---|---|---|---|
| Basic Text Editing | Good | Excellent | Excellent |
| Font Selection | Limited, preset fonts | Large library + custom font import | Massive library + brand kit fonts |
| Animation Library | Basic in/out animations | Extensive (in, out, loop) | Good for static images/videos |
| Text Styling | Basic (color, stroke, background) | Advanced (glow, shadow, grading) | Advanced design tools |
| Object Tracking | No | Yes (automated) | No |
| Custom Templates | No | Yes | Yes (massive library) |
| Best For... | Quick, simple text overlays | Dynamic, motion-based text | Polished, static text graphics |
Ultimately, using tools like CapCut and Canva is about creating a signature style that people recognize as yours. As you get more comfortable, you'll find they open up all sorts of new creative possibilities. Speaking of which, if you're looking for more ways to level up your content strategy, you’ll find some great ideas on the MonetizedProfiles blog.
Making Your Text Readable and Engaging
Knowing the "how" of adding text is just the first step. The real magic happens when you make that text easy and enjoyable to read. If people can't decipher your message in a split second, they'll just keep scrolling.
Think of it this way: bad text is a roadblock, while good text is a signpost guiding your viewer through the video. A few simple design habits can make all the difference.
Contrast Is Everything
The number one rule? Contrast. Your text has to pop against whatever is happening in the background. White text on a bright, sunny sky? Invisible. Dark text over a shadowy corner? Gone. You always need a strong visual separation between your words and your video.
If you're dealing with a busy background or one where the lighting changes, the text background feature is your best friend. A semi-transparent black or colored box behind your text is a classic, foolproof trick. It guarantees your words are readable no matter what’s going on behind them.
Pick the Right Font and Keep It Brief
Fonts have personalities. A fancy, formal font might look completely bizarre on a goofy dance video, just as a bubbly, cartoonish font can kill the vibe of a serious educational clip. The key is to pick a font that matches your video's mood and, just as importantly, is easy to read on a phone. Stay away from super thin or overly cursive scripts that force people to squint.
Remember, TikTok moves fast. No one is pausing to read a wall of text.
- Keep your phrases short and punchy.
- Split longer thoughts into several text clips that appear one after another.
- Stick to one main idea for each piece of text on the screen.
This respects your viewer's attention span and makes your message much easier to absorb. Getting this right is a huge part of what makes a video feel polished. For a deeper dive into making your content shine, check out these essential TikTok video editing tips.
Don't Forget the Safe Zones
This is a classic rookie mistake: placing text right where TikTok's own interface is going to cover it up. The right side and bottom of the screen are already crowded with the creator's name, caption, and the like, comment, and share buttons. Any text you put there is going to get chopped off or become impossible to read.
Key Takeaway: The "safe zones" for your text are the top-middle and left-hand side of the screen. Keep all your important words inside these areas to make sure they're fully visible.
I can't stress this enough: always preview your video before hitting post. A quick check ensures none of your carefully crafted text gets hidden by a button. It’s a tiny step that makes your content look instantly more professional.
Common Questions About Adding Text to TikToks
As you get the hang of adding text to your TikTok videos, you’ll probably run into a few common sticking points. We've all been there. Getting these sorted out early can save you a lot of headaches and make your editing process way smoother.
Let's dive into some of the most frequent questions I hear from creators.
Can I Edit Text on a TikTok After Posting It?
This is the big one, and unfortunately, the answer is a hard no. Once your video is published, that text is baked in for good. You can't go back and fix a typo, change the color, or adjust the timing.
The only way to correct it is to delete the video, fix the text in your draft, and then re-upload the whole thing. It’s a pain, which is why I always tell people to triple-check every single word and animation in the final preview before hitting that "Post" button.
How Do I Make Text Appear and Disappear?
This little trick is all about timing, and you'll handle it using the "Set duration" tool. It's actually pretty simple once you know where to look.
After typing out your text, just tap on it. A little menu will pop up—choose "Set duration." This pulls up a mini timeline at the bottom of your screen. From there, you can drag the red bars at the beginning and end of the text clip to control exactly when it shows up and when it vanishes. It's perfect for syncing words with your audio or actions on screen.
Why Is My Text Getting Cut Off?
Ever posted a video only to realize your perfectly crafted text is hiding behind the like button or your own username? This happens because of TikTok's interface overlay. Think of the bottom and right side of the screen as "unsafe zones" where all the buttons, captions, and profile info live.
My rule of thumb? Always keep your most critical text in the center or upper-left parts of the frame. These are the "safe zones" where you can be sure nothing will cover up your message.
You'll notice that when you're positioning your text in the editor, faint guideline boxes sometimes appear. Pay attention to them! They're there to help you avoid this exact problem. For creators who want a deeper dive into optimizing their content strategy, you can always reach out to our team for more tailored guidance.
At MonetizedProfiles, we specialize in providing creators with monetization-approved accounts to fast-track their journey. Skip the grind and start earning from day one by exploring our ready-to-go accounts at https://monetizedprofiles.com.


